


XAMPP stands for Cross-Platform(X), Apache-server(A), MySQL(M), PHP(P), and Perl(P). It's simply a web-server solution that works locally on your PC and enables you to build and test WordPress websites offline.
To install it on Arch Linux, follow these steps:
Step 1: Download the XAMPP file
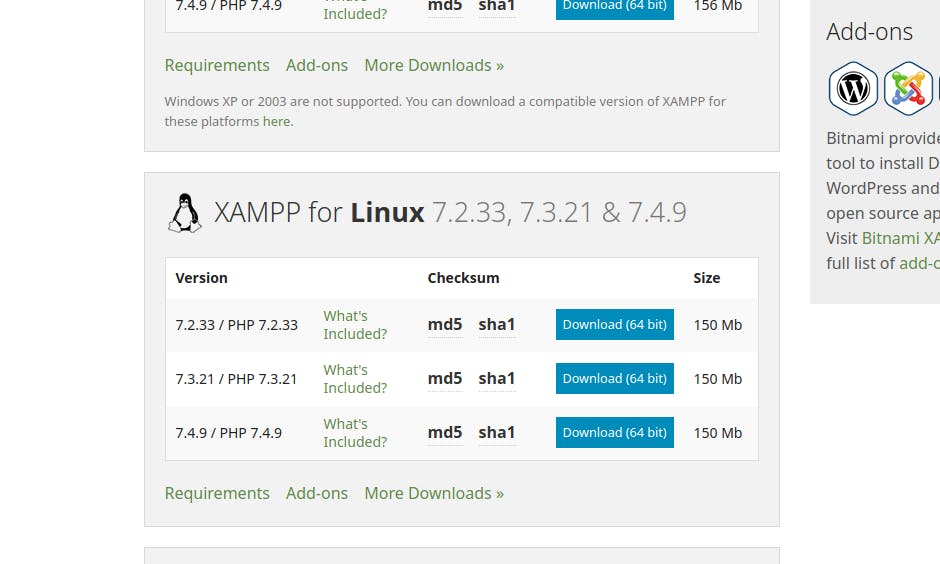 Click on this link to go to the XAMPP download page, scroll down to the section for Linux, and download any version of your choice from the ones listed.
The file that gets downloaded is an installer script.
In this tutorial, I'm downloading XAMPP version 7.4.9. The process is basically the same for whichever version you use, so don't worry about it, just change it to the appropriate version you downloaded where necessary.
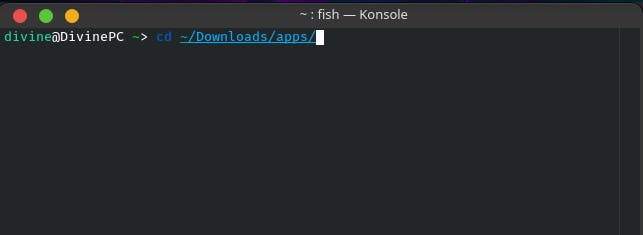
Open your terminal and navigate to your downloads folder (or wherever you saved the downloaded XAMPP installer script. In my case I saved it in a folder named "apps" inside my Downloads folder)
Step 2: Make the installer script executable
First, change permissions for the XAMPP script by typing in a variation of this code
sudo chmod +x xampp-linux-version-installer.run
replace "xampp-linux-version-installer.run" with the name of the installer script you downloaded. So this means in my case it will be:
sudo chmod +x xampp-linux-x64-7.4.9.0-installer.run
Step 3: Run the installer script
After successfully making the installer script executable, run the script by typing (remember to use the name of the installation file you downloaded in place of the one here)
sudo ./xampp-linux-x64-7.4.9.0-installer.run
Congratulations! The installation should have started by now. Just click through and select the options you want to install and use.

For the full guide to installing XAMPP on Arch Linux, read the docs
Thanks for reading.